Dot’s Note: I had to add the word ‘effectively’ to the title of this post because the nosy husband was reading over my shoulder, mocking me that freezing ground beef should just require putting it in the freezer. Sigh. Men.
 We’re all looking for ways to stretch our food dollar these days, and also–if you’re anything like me–we like to have common ingredients on hand so we can pull together a quick dinner without having to run to the store. Ground beef if one of those things I always like to have on hand. It’s great for making a quick chili in the winter, or an easy taco night. Or to beef up a quick pasta meal or pull together a shepherd’s pie. Or even for hamburgers!
I like to keep an eye out for good prices on the Family Pack (3 lb) packages of ground beef in the butcher section, so I always have easy to use and cost effective beef in the freezer..
By putting them up in 1/4 pound patties, they are easy to use as hamburgers when friends drop and an impromptu cookout ensues. But they are equally easy to go straight from freezer to skillet, and brown up for inclusion in whatever might need meat for the evening’s last minute dinner!
See the process below the photos…
-

- 1 large package of ground beef
-

- Estimate 1/4 pound portions
-

- Separate into loose 1/4 pound balls
-

- Lay out 4 balls on a sheet of plastic, and press to shape.
-

- Cover with a second sheet
-

- Press to seal up the plastic, with as little air as possible.
-

- Place in a labeled freezer bag.
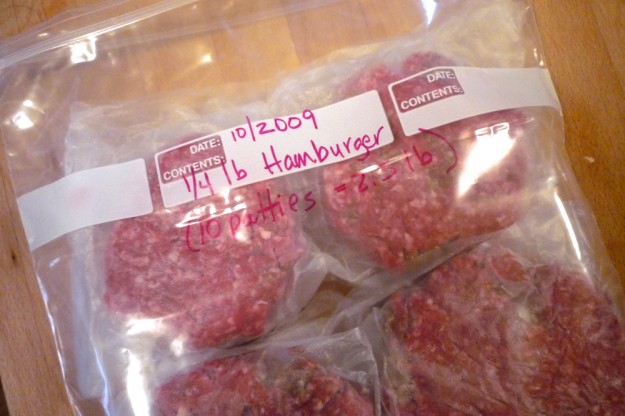
So, for this exercise, we’ll assume you’ve found an approximately 3 lb package of your favorite hamburger meat at your local butcher. As soon as you get it home (or get the opportunity!) separate your meat into 12 1/4 pound balls (you can approximate this, or use your scale to be more accurate). [Note: The photos show a 2.5 lb package split into 10 balls, but you get the idea!]
Then, form into patties. You can just do this with your hands, by gently pressing the meat into a patty shape. Work the meat as little as possible in the process.
If you want an even rounder patty, (I don’t usually bother) you can line a lid from a quart yogurt container or similar sized lid with a sheet of plastic wrap. Gently press your ball into a patty shape
using the lid as a form.
Alternately, you could use clean tuna can, with both the top and bottom removed.
After you have 4 patties, lay out a sheet of plastic wrap or Glad Press N Seal about twice as long as it is wide. On one half, place the 4 patties, with space between them. Then fold over the rest of the sheet, pressing down to remove all the air. Set aside, and repeat with the remaining 8 patties, so you have 3 packages of 1 pound each. Depending on your cooking habits (like if you only cook 1/2 lb of hamburger at a time in general) you may want to wrap your patties in sets of 2 rather than 4. Just makes it easier when you’re ready to use them.
Place 4-8 patties in a large (gallon) ziplock freezer bag.
Use a straw to suck out the air, and create your own shrink wrapped package!
Label with the date, and the number and size of your patties, just in case you forget…
Lay each package flat to freeze.
Now it’s easy to pop out a few hamburger patties for a quick weeknight dinner.